A chain task

26 Aug

At first there was a door

Blender quickly built a lift, imported it into UE and provided it with a noodle code so that the lift goes up, stays and goes down again. So nothing special.
Since I’m sticking to my motto of not getting lost in details when modelling this time, I’m making simple placeholder graphics.

For the door, I thought, come on, make it a bit prettier. So I collected ideas on Pinterest and quickly decided on a door. Rebuilt it in Blender, made UVs and off to UE. Cool, runs like clockwork. The door leaves are simple rectangles, but at least they got a bevel. I made another actor out of it and now the door opens, waits 3 seconds and closes again. Until then, everything was going great and I was in the flow.

Then came … ID cards

Then I came up with the idea of including ID cards. For me, ID cards somehow belong to a spaceship. Besides, it makes the game a bit more interesting if you can’t immediately go anywhere.
Such a system shouldn’t be a big deal either, I thought, and got started.
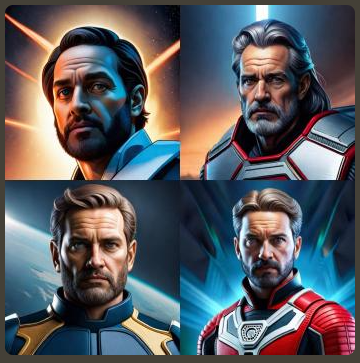
I created another placeholder graphic in Blender. Although I didn’t want to get lost in the details, for me a card like this also needs the face of the card holder.
I didn’t want to take pictures, I have no talent for drawing and so I tried BlueWillow and had some pictures taken by Spaceheroes. The results were absolutely usable.

OK, texture ready, off to UE, created a material and assigned it to the map. Then I adjusted the noodle code. And again a sense of achievement. The door stays closed if you don’t have a card and opens if you have picked it up beforehand.

now colour comes into play

I was thrilled how well everything had worked up to that point. Shortly afterwards, I thought about the need for a multi-colour system. I also realised that the texture of the ID card had a resolution of
1024 x 1024. If I wanted to implement 4 colours, that would be a waste for a mobile game.

4 UV Maps into UE

So back to Blender, reduced the UVs of the ID map by 0.5 and pushed them into the bottom left corner. I created a total of 3 more copies of the UV map and placed them in the top left, top right and bottom right corner. I exported the new model with the 4 UV maps to UE and checked whether all UV channels “survived” the import. This was also the case. I was in good spirits because everything had gone like clockwork so far.

As if

But here my lucky streak ended.

My goal was to make an actor, assign the mesh to the ID card and control the colour code of the card via a variable in the properties window. I thought if I searched long enough I would find a tutorial with the blueprints I needed.
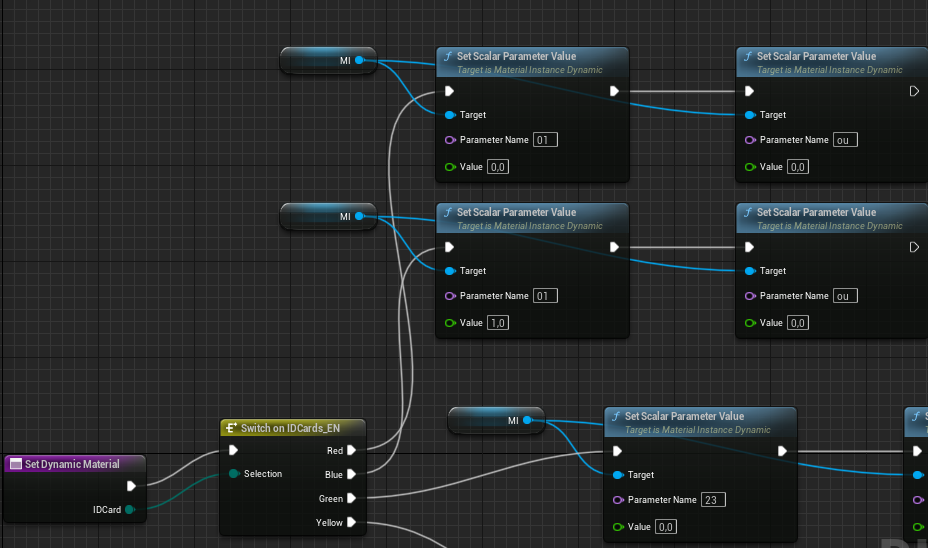
To cut a long story short, I searched for several evenings and found nothing to change the UV channels in the material via blueprint. My research then led me to the “Material Instances”. After a lot of back and forth and trial and error, I found it.
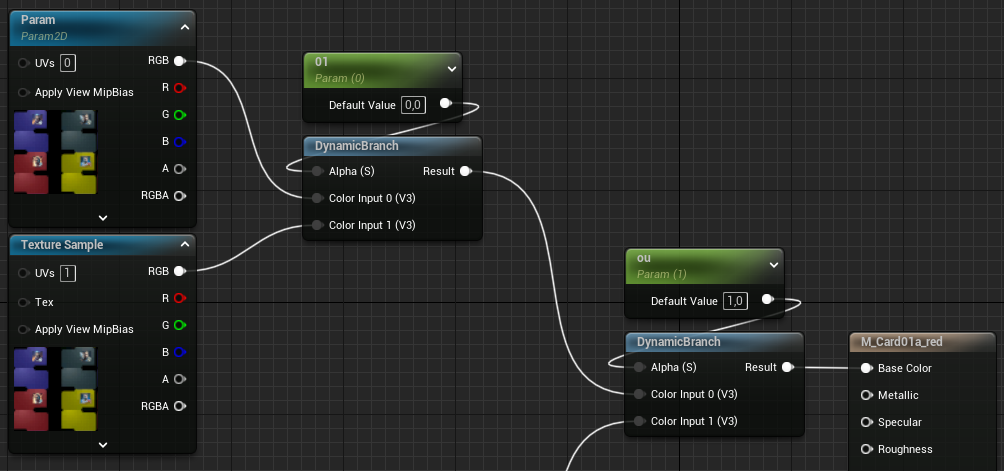
The solution consists of a material, dynamic branch which can easily be controlled by Scalar parameters. Here are a few pictures that outline the solution.

Elegant is different

The implementation is not elegant in my eyes. In my eyes, there should have been something that I could influence the UVs directly. I am still extremely far away from being an expert in the Unreal Engine, but I believe that there is no other solution and that there are certainly technical reasons why it is not possible directly.

I achieved my goal in the end and I enjoy setting doors in the editor, distributing ID cards, setting the colours and everything works as desired.

Absent for a long time

02 Feb

… but with two great new sources back

One thing in advance. I am giving my own, personal and most importantly unpaid opinion here!

For a very long time, nothing happened on the site for various reasons. However, the project itself is not in danger. In the meantime, as it is my way, I have continued to look around for useful things. In the process, I came across two extremely good things that I would now like to share with you.

Firstly:
I have been following Josh Gambrell on YouTube for a long time. He posts new videos on his channel very regularly. His focus is on hard surface modelling and he is very willing to show his workflow. Apart from his favourite tools (Hardops and Boxcutter) he also has enough tutorials focusing on the pure Blender toolset (Vanilla Blender). As his name suggests his tutorials are in English but he is, in my opinion, very easy to understand. If I remember correctly from one of his videos, he lives in Orlando and studies maths. On top of that, he makes so many useful tutorials for the Blender community and does it constantly over such a long period of time, which simply deserves my respect and recognition.

I just recently became aware of his website BlenderBros, which he and his buddy Ponte Ryuurui run. There is free material as well, but the focus of the site is on large, comprehensive and detailed tutorials that you can buy.
I usually avoid anything commercial because 3D, Blender, Unreal are my hobbies and I don’t make money with them, but I once made an exception here.

Why?

Because:
There are extremely detailed tutorials focusing on the workflow for games. That’s exactly the topic I’m dealing with at the moment. The techniques that are covered seemed to be extremely helpful for my path. In addition, and what recently convinced me to buy some of the videos, was that the design aspects are also discussed. Basically an all-round carefree package for me.

I chose the packages The Hard Surface Game Asset Course, Hard Surface UV Unwrapping and The Blender Bros Design Course. The discount granted for 3 days after registration plus the Euro – Dollar exchange rate, which was good for me, made the decision to buy easier.

In the tutorials, some basic and helpful settings in Blender are shown, there is, of course, modelling and everything is explained extremely well. Fixing shading issues are covered in great detail. What I never realised is that it is better to triangulate the models in Blender before importing them into game engines.
UV mapping, a favourite topic of mine back in Maya days, is also addressed in detail. I found his approach most remarkable.
An equally large focus is on non-destructive modelling. Unlike in Photoshop, where this way of working is clear to me, in Blender I always lacked the approach of how to implement it in modelling.

Secondly:
Among other things, the tool Quixel Mixer is used in the workflow. Surprisingly, I hadn’t even been aware of it until now. Fortunately, it’s free and has become part of the “Unreal cosmos”. From now on, I will also be using it, because it massively supports the texturing of the models.

According to my research so far, Quixel Mixer does not offer any baking options. However, I came across this tutorial which explains the Baking process (Normals, Ambient Occlusion, Curverture and Ids) in extreme detail. All of this is groundwork for use in Quixel Mixer.

I will also try to adopt the procedure shown here. According to the motto of my website “why should you search for something I have already found” here is the video.

Translated with www.DeepL.com/Translator (free version)

How do 3D models appear more vivid

13 Sep

The hard way vs. the easy way

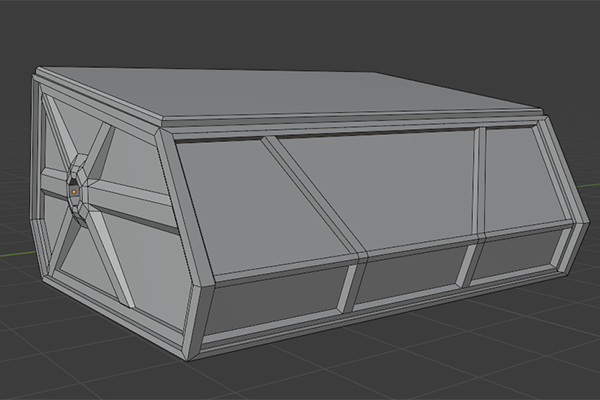
As mentioned before, I have created a few models. Among other things a container. UVs are done and now I got to work on the textures. I try to design my work steps in a way that I can make changes later. Accordingly, there is no point in brushing everything onto one texture. At the moment my approach is to take an RGB node in the shading tab for the base color.

the hard way

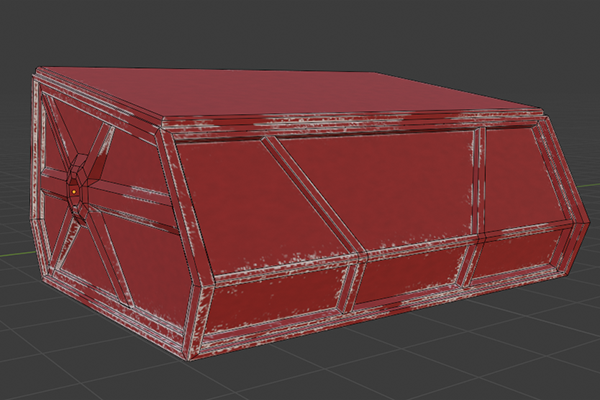
Since it was already late at night, shortly before 0:00, I just wanted to quickly make the edges of the model appear more worn. So I created a new texture, selected it and ran it over the edges of the model with white. Nice and messy. After I had been running down the edges for a while, I merged both textures with the MIX RGB. It already looked really good. Inspired by the small success I created another texture on which I darken the areas where edges meet inside. I can’t describe it more accurately right now.

To “run off edges” sounds so simple, but I quickly realized that the process alone will cost me a lot of time, It must be possible to do this procedurally.
My knowledge of the various nodes in the shading editor is still severely limited, but quickly heard from the geometry node that the “worn edge effect” can be achieved with the pointiness value. After a while of trying I stopped because I had to realize that I can’t do it.

the easy way

Today in the lunch break I searched for “edge detection” and found a video in which a Nodesetup is presented which creates my searched effect. here is the link to the video. In the description of the video you can download the blendfile with the nodesetup.
I tried it today on my container and it works great.

As a final step towards more liveliness, I wanted to add dirt in an automated way using an ambient occlusion map. After some experimentation I was not satisfied with the result and decided to paint the dirt by hand on a custom image texture.

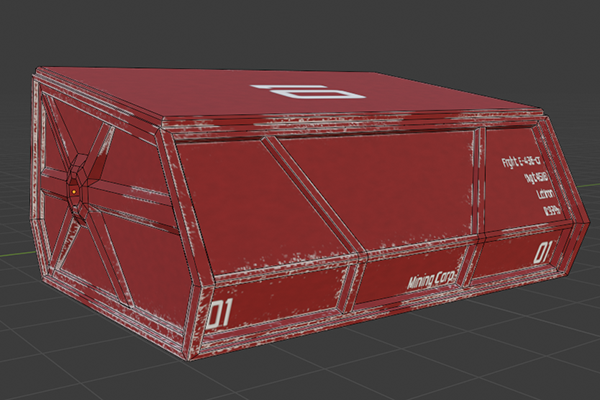
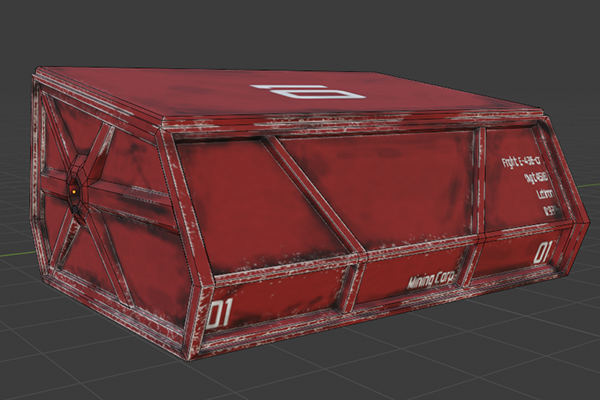
Here now the first result of the container with the worn edges, labels and soiling

Translated with www.DeepL.com/Translator (free version)

UV unwrapping, textures for mobile phones

13 Sep

and how it behaves on mobiles.

I’m working on the first 3D objects in the meantime. A simple model, a container, in which the containers with the raw materials are located, is ready and yesterday evening I dealt with the UVs in Blender. In my wanderings through the internet and the many YouTube videos I picked up that you should not give a model multiple materials for performance reasons. This made me think of a tutorial I saw a long time ago by Grant Abbitt.

In the tutorial he modeled an ancient house. It consisted of walls, beams, windows and the roof. All objects were independent and had their own materials. He showed how he combined them on a new material, a UV map and only one texture. On this blog I will describe my steps, what solutions I found to my problems and especially what tutorials helped me. From this a link list will develop, which I will make available to you bundled.

So today the first links for the list.

The first link is to his first video on the subject, made in 2018.
It will probably have been Blender 2.79.

The second video is an update. Here he is busy with the current version of Blender.

Translated with www.DeepL.com/Translator (free version)

Suddenly only black

13 Sep

After celebrating the time saved in “wiping edges” when first testing the Nodesetup from my last post, I want to use it for my container textures. However. All of a sudden I destroy all my textures when beaconing. All of them are overwritten with black. Admittedly, it was already quite late. I was approaching the witching hour, but still tried to figure out why this was happening.

What did I do before.

Worn edges are one thing, but I wanted to improve it even more. I wanted to put labels on the container, and was thinking about how to implement it with Blender. At first I thought I could switch directly to a text tool instead of a brush, similar to Photoshop, position the cursor and go…. Unfortunately, no.
I came across the Stencil in my research. So I wrote the numbers 0 – 9 on a large template in different fonts, created a separate texture for the font in Blender and applied the labels to the container.
This made it look a little more authentic again.
After that I wanted to bake everything together on one texture (base color, worn edges and the font) and suddenly the texture was painted over with black.
So it was obvious that I had changed something with the settings for the stencil, and I reset everything again …. without success.

The simple solution

Ok, to shorten it. It took me a while to find the real reason. During the day I am a normal working person and only in the evening hours I turn into the Game-Dev…..

In the Principled BSDF – Shader I played around with the metallic and roughness values. In the process, I set the material to specular. Well, what do you see on a specular surface when everything around you is black — ??? exactly.

So puzzle solved, warning level down again and textures built up again in a relaxed manner.

Translated with www.DeepL.com/Translator (free version)