At first there was a door
Blender quickly built a lift, imported it into UE and provided it with a noodle code so that the lift goes up, stays and goes down again. So nothing special.
Since I’m sticking to my motto of not getting lost in details when modelling this time, I’m making simple placeholder graphics.
For the door, I thought, come on, make it a bit prettier. So I collected ideas on Pinterest and quickly decided on a door. Rebuilt it in Blender, made UVs and off to UE. Cool, runs like clockwork. The door leaves are simple rectangles, but at least they got a bevel. I made another actor out of it and now the door opens, waits 3 seconds and closes again. Until then, everything was going great and I was in the flow.
Then came … ID cards
Then I came up with the idea of including ID cards. For me, ID cards somehow belong to a spaceship. Besides, it makes the game a bit more interesting if you can’t immediately go anywhere.
Such a system shouldn’t be a big deal either, I thought, and got started.
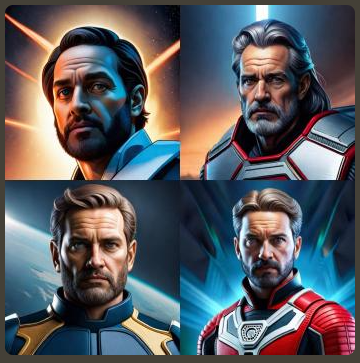
I created another placeholder graphic in Blender. Although I didn’t want to get lost in the details, for me a card like this also needs the face of the card holder.
I didn’t want to take pictures, I have no talent for drawing and so I tried BlueWillow and had some pictures taken by Spaceheroes. The results were absolutely usable.
OK, texture ready, off to UE, created a material and assigned it to the map. Then I adjusted the noodle code. And again a sense of achievement. The door stays closed if you don’t have a card and opens if you have picked it up beforehand.
now colour comes into play
I was thrilled how well everything had worked up to that point. Shortly afterwards, I thought about the need for a multi-colour system. I also realised that the texture of the ID card had a resolution of
1024 x 1024. If I wanted to implement 4 colours, that would be a waste for a mobile game.
4 UV Maps into UE
So back to Blender, reduced the UVs of the ID map by 0.5 and pushed them into the bottom left corner. I created a total of 3 more copies of the UV map and placed them in the top left, top right and bottom right corner. I exported the new model with the 4 UV maps to UE and checked whether all UV channels “survived” the import. This was also the case. I was in good spirits because everything had gone like clockwork so far.
As if
But here my lucky streak ended.
My goal was to make an actor, assign the mesh to the ID card and control the colour code of the card via a variable in the properties window. I thought if I searched long enough I would find a tutorial with the blueprints I needed.
To cut a long story short, I searched for several evenings and found nothing to change the UV channels in the material via blueprint. My research then led me to the “Material Instances”. After a lot of back and forth and trial and error, I found it.
The solution consists of a material, dynamic branch which can easily be controlled by Scalar parameters. Here are a few pictures that outline the solution.

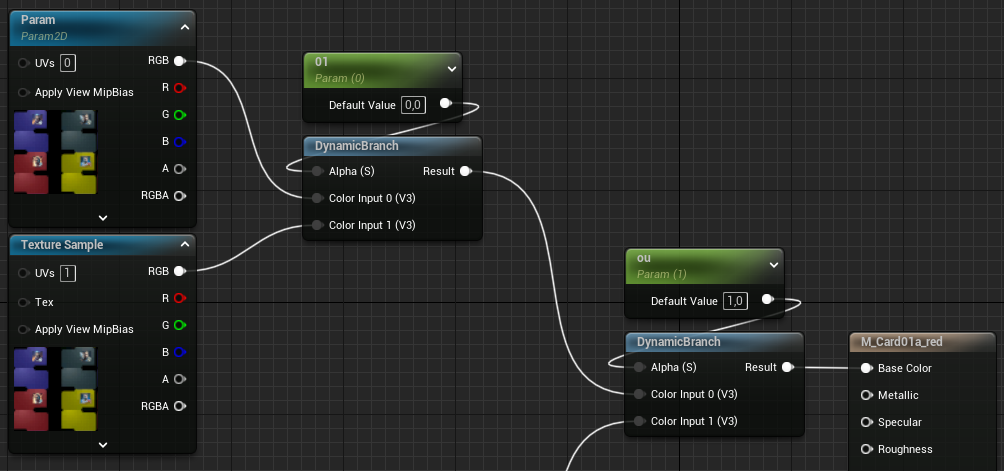


Elegant is different
The implementation is not elegant in my eyes. In my eyes, there should have been something that I could influence the UVs directly. I am still extremely far away from being an expert in the Unreal Engine, but I believe that there is no other solution and that there are certainly technical reasons why it is not possible directly.
I achieved my goal in the end and I enjoy setting doors in the editor, distributing ID cards, setting the colours and everything works as desired.